
Eye Makeup Brushes Explained: The Ultimate Guide for Women Over 50
If you’ve ever looked at your makeup bag and thought, “Do I really need all these brushes?” you’re not alone! Many women (especially over 50) collect brushes over the years without really knowing what each one is for (or we forget along the way, right?😜). The good news? Once you understand the role of each type of brush, you’ll be able to organize what you already own and feel confident when shopping for new ones.
📺 Watch on YouTube
Be sure to subscribe to my channel, Michelle Fox Beauty.
Why the Right Brush Matters ✨
Using the right brush isn’t just for professional makeup artists. It makes application smoother, more precise, and more flattering. For women over 50, brushes are especially helpful because they can:
Prevent product from settling into fine lines
Blend colors seamlessly for softer looks
Allow precise placement (hello, lifted eye effect!)
I’ve talked before about the importance of careful placement in my post on How Women Over 50 Can Wear Dramatic Eye Makeup, and brushes are the tools that make that possible.
The 7 Essential Makeup Brush Categories
Let’s simplify your collection by grouping brushes into categories. Chances are, you already own many of these, whether you realize it or not!

1. Basic Eyeshadow Brush 🎨
Your go-to brush for applying a base color across the lid. Can also be used to apply highlight under the brow.
Shape: Flat, medium-sized, slightly dense, square or round.
Use: Packs color evenly onto your eyelid or browbone.
May be called: all-over eyeshadow brush, lid shader, round blending eye brush, basic eyeshadow brush.
🚨 Always, Always, Always use eye primer before applying your eye makeup! It will blend better, last longer, and look smoother, plus the color payoff is vastly improved. You're welcome!

2. Crease Brush 🌙
Adds depth and definition to the crease of your eye. This category has a few subtypes:
Long & Tapered (pictured): Perfect for blending into a soft, natural crease; provides a sheer wash of color.
Specialty: Crease brushe are also created for specific eye shapes like hooded or deep-set eyes.
Detailed Brush: Mini version of a blending brush for layering color in the crease.
👉 Want more crease tips? Check out my earlier post, Can Women Over 50 Really Pull-off This Look?

3. Blending Brush ☁️
The “eraser” of the brush world. It blends harsh lines and softens edges.
Shape: Long, wide, fluffy and dome-shaped.
Use: Blurs colors together for a seamless finish.
💫 I do not dip my blending brushes into eyeshadow. I keep them exclusively for blending.

4. Accent Brush ✨
For those special touches of color and detail. Subcategories include:
Square Head: Ideal for laying down your darkest shade in the outer corner of your eye. Large square head accent brushes are for creating a smoky eye effect by depositing the darkest shade all over the lid.
Small Round Head: Great for very precise placement of dark color in outer corner (needs to be blended out) as well as inner corner highlights (by the tear duct). Can also be used to create a cut crease.
Flared "broom" shape (pictured): Perfect for blending darker shades using a circular motion in the outer corner.

5. Liquid, Cream & Concealer Brush 💧
Designed to smooth out creamy formulas.
Shape: Flat, stiff, somewhat square synthetic bristles that may have a point in the center for precision
Use: Apply concealer under the eyes, cream eyeshadow, eye primer, or even lipstick with precision.
✨ Can also be used as a Shimmer Shadow Brush, applying shimmer in the center of your mobile lid.
6. Liner Brush 🖊️
For precise lines that define the eyes. Here are three different types:
Skinny, Angled, Stiff Brush: Best for eyeliner or filling in brows
Ultra-Fine Tip: Perfect for gel or liquid eyeliner application
Short, Stiff, Straight Brush: For smudging eyeshadow along the lastline or tightlining under your lashes.
📝 Note: these brushes often have a spoolie at one end that can be used to tame your brows and separate your lashes.

7. All Over Blending Brush 🌸
Larger, fluffier version of a blending brush.
Use: Sweeps across your lid and crease to soften everything into a polished finish
✨ Tip: Can also be used to apply highlighter or contour
Organizing Your Brushes 🪄
Once you know your categories, it’s easy to organize! Try this:
Group brushes by function (crease, blending, accent, liner, cream, lid)
Use small jars, acrylic organizers, or brush holders to keep them separated
Label each category if you’re new to brush organization
Keep only what you actually use. Donate or repurpose the extras
🫧 Tip: Wash your brushes weekly with a gentle cleanser to keep your skin healthy and extend the life of your tools.
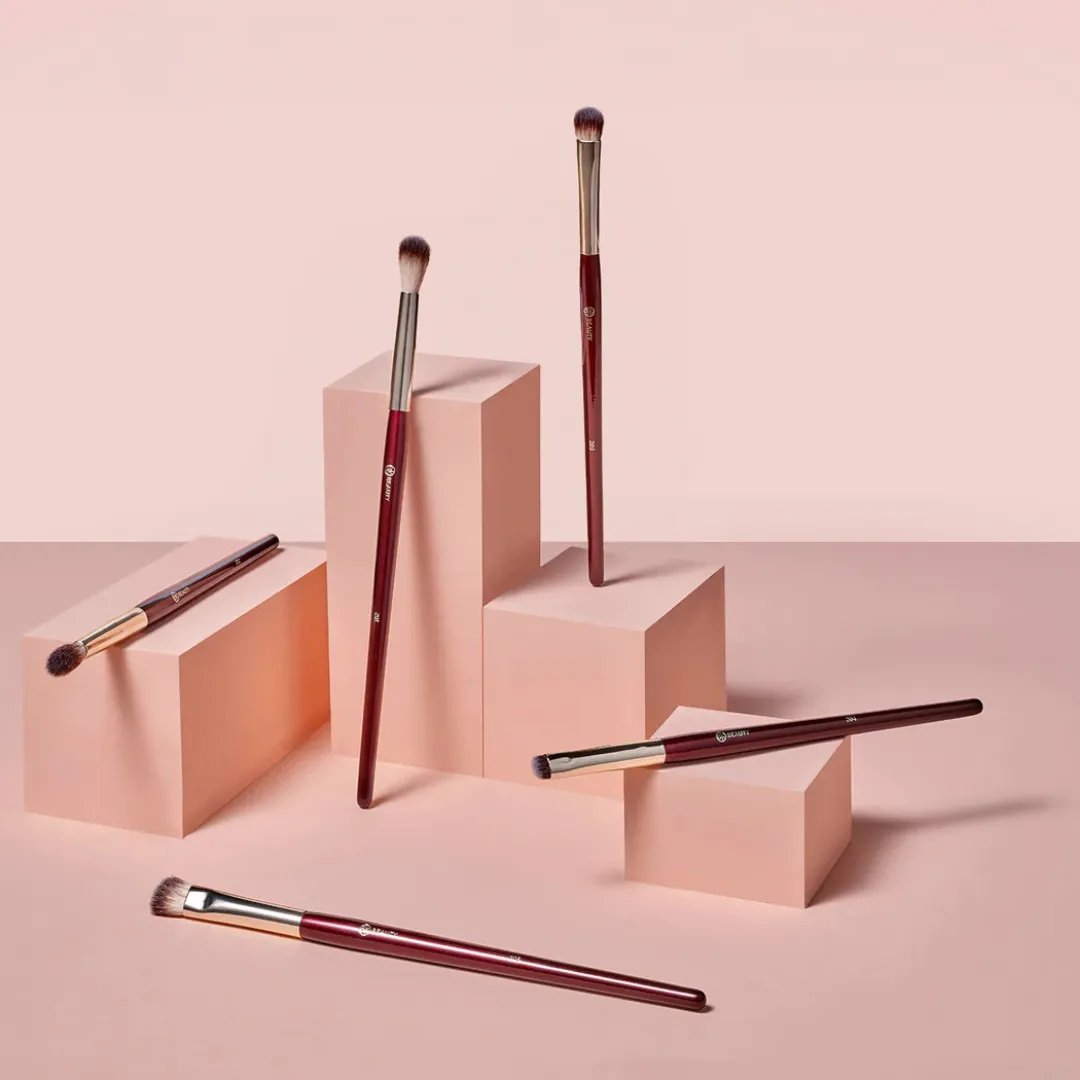
Recommended Brush Brands 🖌️
I’ve put together my favorite brush picks on Amazon and ShopMy Shelf so you can easily upgrade your collection. Pictured below is BK Beauty Essential Eye Brush Set.

Final Thoughts
Makeup brushes don’t need to be overwhelming! With just a few key categories, you can create everything from soft, natural looks to more defined, glam styles. And remember, the right tools make all the difference in how your makeup looks, especially as we age.
💌 For more beauty insights delivered straight to your inbox, subscribe to my VIP list!
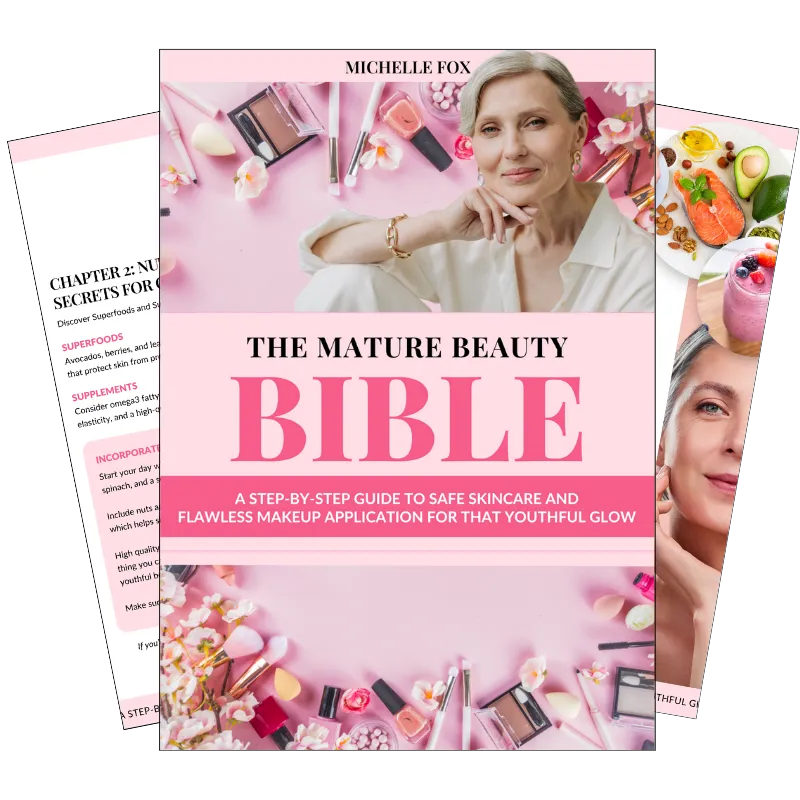
✊🏼 Grab your free copy of The Mature Beauty Bible!


Facebook
Instagram
LinkedIn
Youtube
TikTok
Pinterest